
| Main Monthly Page | Unique Expressions: More Details - page 1 (of 22) |
More Details | Home Page Menu / Back to Overview Pages
Drawing by Neil Huggett
|
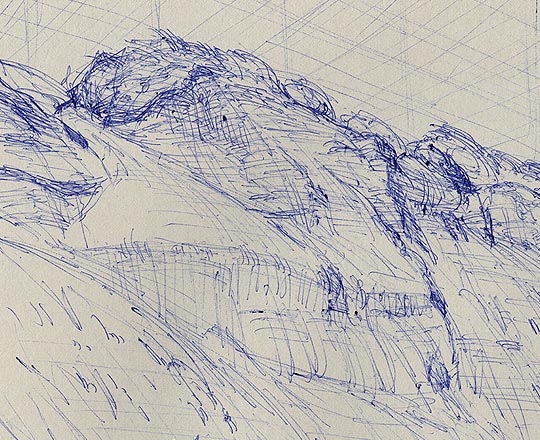
Drawing Using BirosI have always enjoyed using biros for drawing. Once the ink is dry (usually very quickly), it doesn’t smudge like pencil marks do. I don’t have to keep sharpening the point of a biro. The point doesn’t get slowly blunt and produce thicker, softer lines. One can still achieve a range of marks and lines with a biro - light lines, heavy lines, deliberate lines, quick lines, dots, dashes, shading using hatching and squiggles, etc. Biro doesn't really lend itself to making quick or detailed studies based on tone. The strength in using biros to draw with comes from being able to concentrate on outlines, defining areas, and drawing in contour lines. Biro doesn’t erase very well, so I have never bothered with any eraser. Therefore, my materials are fairly minimal - a piece of paper, a firm support (usually a portable drawing board) and a biro pen. This is a very efficient combination of materials for recording ideas and drawings; cheap, simple, and can be quite quick (which is very important when working outdoors from the real world, that is forever changing). I started using blue coloured biros for all of my biro drawings, probably because I used blue biros for most of my writing when I was at school. I found the quality of the blue ink to feel better to work with for some reason than the black, red, green or purple biro inks. While living at West Beach in South Australia between 1982 and 1986, I found some smooth grey A4 sized paper that worked very well as a base for my blue biro drawings. I usually drew on-site (“en plein air”), outside in bright light and the grey paper was far less blinding to use than white paper. I also found the combination of the blue ink on grey paper to be aesthetically pleasing. When I wanted to work on larger drawings though, such as “Self Portrait in Biro”, I had to revert to using white paper. When using white paper, I started using black biros more and more. When looking at the world around me, I am often inspired by 2 main things:
With most of my biro drawings, I find myself trying to express the three-dimensional forms and spaces that I can see (and feel). Biro drawings can efficiently and accurately capture the outlines of forms, but they are not really suitable for capturing colours or extensive tonal relationships. I therefore found it a lot more efficient to draw in ‘imagined cross-sectional’ lines, or ‘imagined contour lines’.
Imagined Contour Lines and Imagined Grids‘Imagined contour lines’ indicate the cross-sectional shapes of the various forms, the orientation of the surfaces to the viewer, and may set up ‘rhythms of flow’ within the depictions of forms. These lines are ‘felt’ from looking at the real forms and are considered by me to be extremely important for the accurate expression of the forms experienced. Even though some forms may have rings around their forms, there may be many situations where those rings are not what is really required for the appropriate expression of the forms, especially at junctions. I have found that the contour lines need to be drawn with high precision, and with quite a bit of experimentation. The end results are ‘felt’ back by me and compared to the real forms. Fine adjustments and changes are often required. The use of ‘imagined contour lines’ subsequently led to adding ‘imagined grids’ to various surfaces, or even various spaces. These imagined contour lines and imagined grids make up part of my unique expressions of forms and spaces. Many of my biro drawings contain imagined contour lines and/or imagined grids. The biro drawing above is one good example. |
More Details | Home Page Menu / Back to Overview Pages
| Main Monthly Page | Unique Expressions: More Details - page 1 (of 22) |